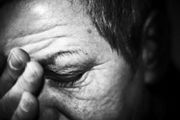
Much of the western world in the 21st century thrives on accomplishment, driven to achieve no matter what the cost. It’s no wonder that 45 million Americans experience chronic headaches or that 74 percent of the U.S. population has had tension headaches.
In her renowned book Relax and Renew, Judith Lasater called restorative yoga “the antidote to stress.” Not enough time in your day to practice yoga? Think again! Lasater wrote that, when practiced regularly, simple yoga postures can help reverse the effects of stress in a mere 5 minutes per day.
If you suffer from tension headaches and need to let off a little steam, take 5 to 15 minutes out of your day to practice these restorative yoga poses. You may be surprised at how “en-lightened” you feel!
Each of these yoga poses for headaches is ideally practiced for 5 minutes or longer. Practice them separately, or together for maximum benefit.
Supported Half-Dog Pose
This pose utilizes a table, desk or low countertop.
- With your bare feet hip-width apart and parallel, hinge forward from the hips, resting your upper body on the table. Your legs should be straight. If your body is not at a 90-degree angle, you can place a folded blanket or two underneath your torso for added support.
- Rest your forehead on the table with your arms stretched out in front of you, or rest your forehead on folded arms. Breathe slowly and steadily as your whole upper body rests on the table.
- Bend your knees a little, and let gravity support your legs. Lengthen your back and neck as you breathe out. Breathe steadily in the pose for several minutes.
- When you are ready to come out of the pose, bend your knees a bit deeper and use your arms to help you rise up to standing. Stand tall and take a few slow, deep breaths.
Viparita Karani (Legs-Up-the-Wall Pose)
This is a mild inverted pose. You will need a bolster and one or more folded blankets for support. While beneficial for most people, legs-up-the-wall pose is not recommended if you have been told to avoid inversions.
- Place your bolster parallel to a wall, about 6-10 inches away from the wall. Sit on one end of the bolster with your hip and shoulder facing the wall.
- As you roll back onto the bolster, swing your legs up the wall. You may need to adjust your lower back on the bolster, or move your bolster further away from the wall to get comfortable. If you need more support under your lower back, you can place a folded blanket on top of the bolster before you roll back. In position, your legs should be almost perpendicular to the floor, and your back will be slightly arched.
- Place a thin towel or blanket, rolled at one end, underneath your neck. Adjust the size of the roll to provide support for your cervical vertebrae.
- Allow your arms to rest alongside your body or overhead. For further relaxation, place an eyebag over your eyes.
- Take several slow, steady breaths. When you are ready to come out of the pose, bend your knees, press your feet against the wall and lift your pelvis so that you can slide your body off the bolster. Lie on the floor with your legs elevated on the bolster for a few moments, and then roll to one side and sit up slowly.
Savasana (Final Resting Pose)
Almost every yoga practice ends with savasana. When practiced after a series of other postures, savasana provides deeper relaxation and meditation.
- Lie flat on your back with your arms alongside your body, palms facing upward. Allow your ankles to drop out to the sides. If there is any pain in your lower back, place a rolled blanket or bolster underneath your knees. You can also place a folded blanket under your feet for extra support.
- Completely relax all the muscles of your body, starting at the feet (toes, arches, heels) and moving your way up limb by limb to the crown of your head. Relax your jaw, separating your teeth and relaxing your tongue away from the roof of your mouth. Allow your eyes to sink deeper into their sockets. Feel your palms getting heavier as you release tension from each of your fingers. Breathe.
- As your breathing begins to slow down and deepen, notice the length of your inhalation and exhalation. Allow yourself to exhale completely.
- When you are ready to come out of the pose, allow natural movement to return to your body. You might want to gently wiggle your fingers and toes, or glide your thumb across each fingertip. Take a deep breath in as you raise your arms overhead, lengthening from toes to fingertips. Bend your knees and roll over to one side and rest for a few moments before using your arms to come up to a seated position. Sit tall for several breaths before gently opening your eyes and completing your practice.
The yoga poses introduced in this article should be modified if you are pregnant or suffering from a chronic condition. Consult a trained yoga instructor or medical practitioner for further guidance.
Sources:
RealAge.com
Relax and Renew
Hillary Easom is a certified yoga instructor. She teaches in the San Francisco Bay Area.
We value and respect our HERWriters' experiences, but everyone is different. Many of our writers are speaking from personal experience, and what's worked for them may not work for you. Their articles are not a substitute for medical advice, although we hope you can gain knowledge from their insight.


Add a CommentComments
There are no comments yet. Be the first one and get the conversation started!